Local SSH vs OOD
SSH vs OOD
| SSH | OOD | |
|---|---|---|
| Network | UVA Network/VPN required | No network requirement |
| Execution | On front-end, no running code | On production nodes, can run code |
| Resources | ijob resources specific to terminal | No need for ijobs, have resources already |
| Notes | Must take extra care to use properly | Some extensions may be unavailable |
Why Even SSH?
- Extension Availability
- But if one isn’t available just reach out to us!
- Local preferences
- But you can export the settings.json file to HPC
- No queue wait time
- But if you are requesting appropriate, interactive resources the wait time will be minutes at our busiest
In Most Cases, Use OOD
We strongly urge our users to use OOD.
Those resources are available and best for our users.
All functionality is the same and you will always have access to compute resources.
You will not need to worry about being overwhelmed with processes or fighting with ijob terminals.
Setting Up SSH
Download SSH Extension
Search for “Remote – SSH” in the Marketplace.
It is not necessary but it is a tool to make it much easier.

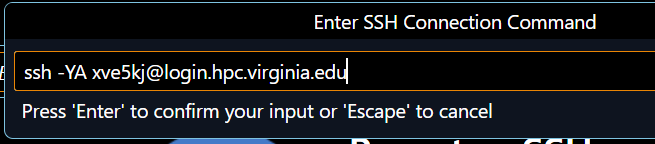
Create Connection
Connect to Host > Add New SSH Host…
ssh -YA mst3k@login.hpc.virginia.edu
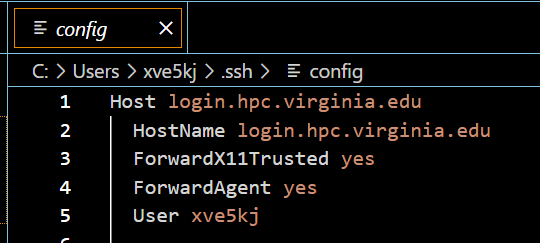
Modify your config file
You can later open and edit the config file as you need


You Are Now Connected!

Now that you are connected you can open up your workspaces you’ve created, open your folders, etc.
You can see your connection in the bottom right
You still stay connected so long as you stay on the network

Running Code with SSH
Run an IJob
Open a new terminal
ijob -c 6 -A hpc_training -p interactive --time=00:30:00
Starts an ijob on the interactive partition with 6 cores for 30 minutes
Will need to wait for resources to be available
An ijob is specific to the terminal you start it in, you only have access to those resources in that terminal
The job ends if you close the terminal

Important Caveats:
This is for running code via terminal commands
If you want to run Python code you need to “Run Python File” first, then type in ijob command in that new terminal
Different method for JupyterLab
DO NOT RUN JOBS FROM IJOBS
Interactive JupyterLab
Start an ijob, then load JupyterLab and start a notebook server:
module load miniforge jupyterlab
jupyter-notebook --no-browser --ip=0.0.0.0
Copy the URL that starts with http://.
In VS Code, select Existing Jupyter Server, paste the URL, and press Enter.

Select your kernel from the kernels we offer or create your own kernel from a conda environment.

Logging Out
VSCode can create many processes on the front-ends.
If you are going to use SSH you must use it properly.
Disconnect your session every time you are finished.
Do not leave it running in the background.
In most cases, the OOD interactive app is superior and preferred to SSH.