IDEs
Our first example of an Integrated Development Environment, or IDE, is Spyder. Spyder is aimed specifically at Python. It is well suited to developing longer, more modular programs.
The authors generally recommend the standalone version referenced
earlier. If using this application, always start it from your operating system’s launcher. Remember that each environment must include the ipython package for it to be recognized by this application.
In an HPC system, or if not using the standalone version, you must activate the environment and spyder must be installed. Go to the Miniforge Prompt (Windows) or a terminal (Linux or MacOS) and type
spyder
It may take a while to open (watch the lower left of the Navigator). Once it starts, you will see a layout with an editor pane on the left, an explorer pane at the top right, and an iPython console on the lower right. This arrangement can be customized but we will use the default for our examples, but with a different theme.
The first time you open Spyder it will offer a tour of its features. We recommend you go through it. You can change the appearance, layout, and other options from Tools->Preferences. Spyder’s full documentation is here.
Type code into the editor. The explorer window can show files, variable values, and other useful information. The iPython console is a frontend to the Python interpreter itself. It is comparable to a cell in JupyterLab.
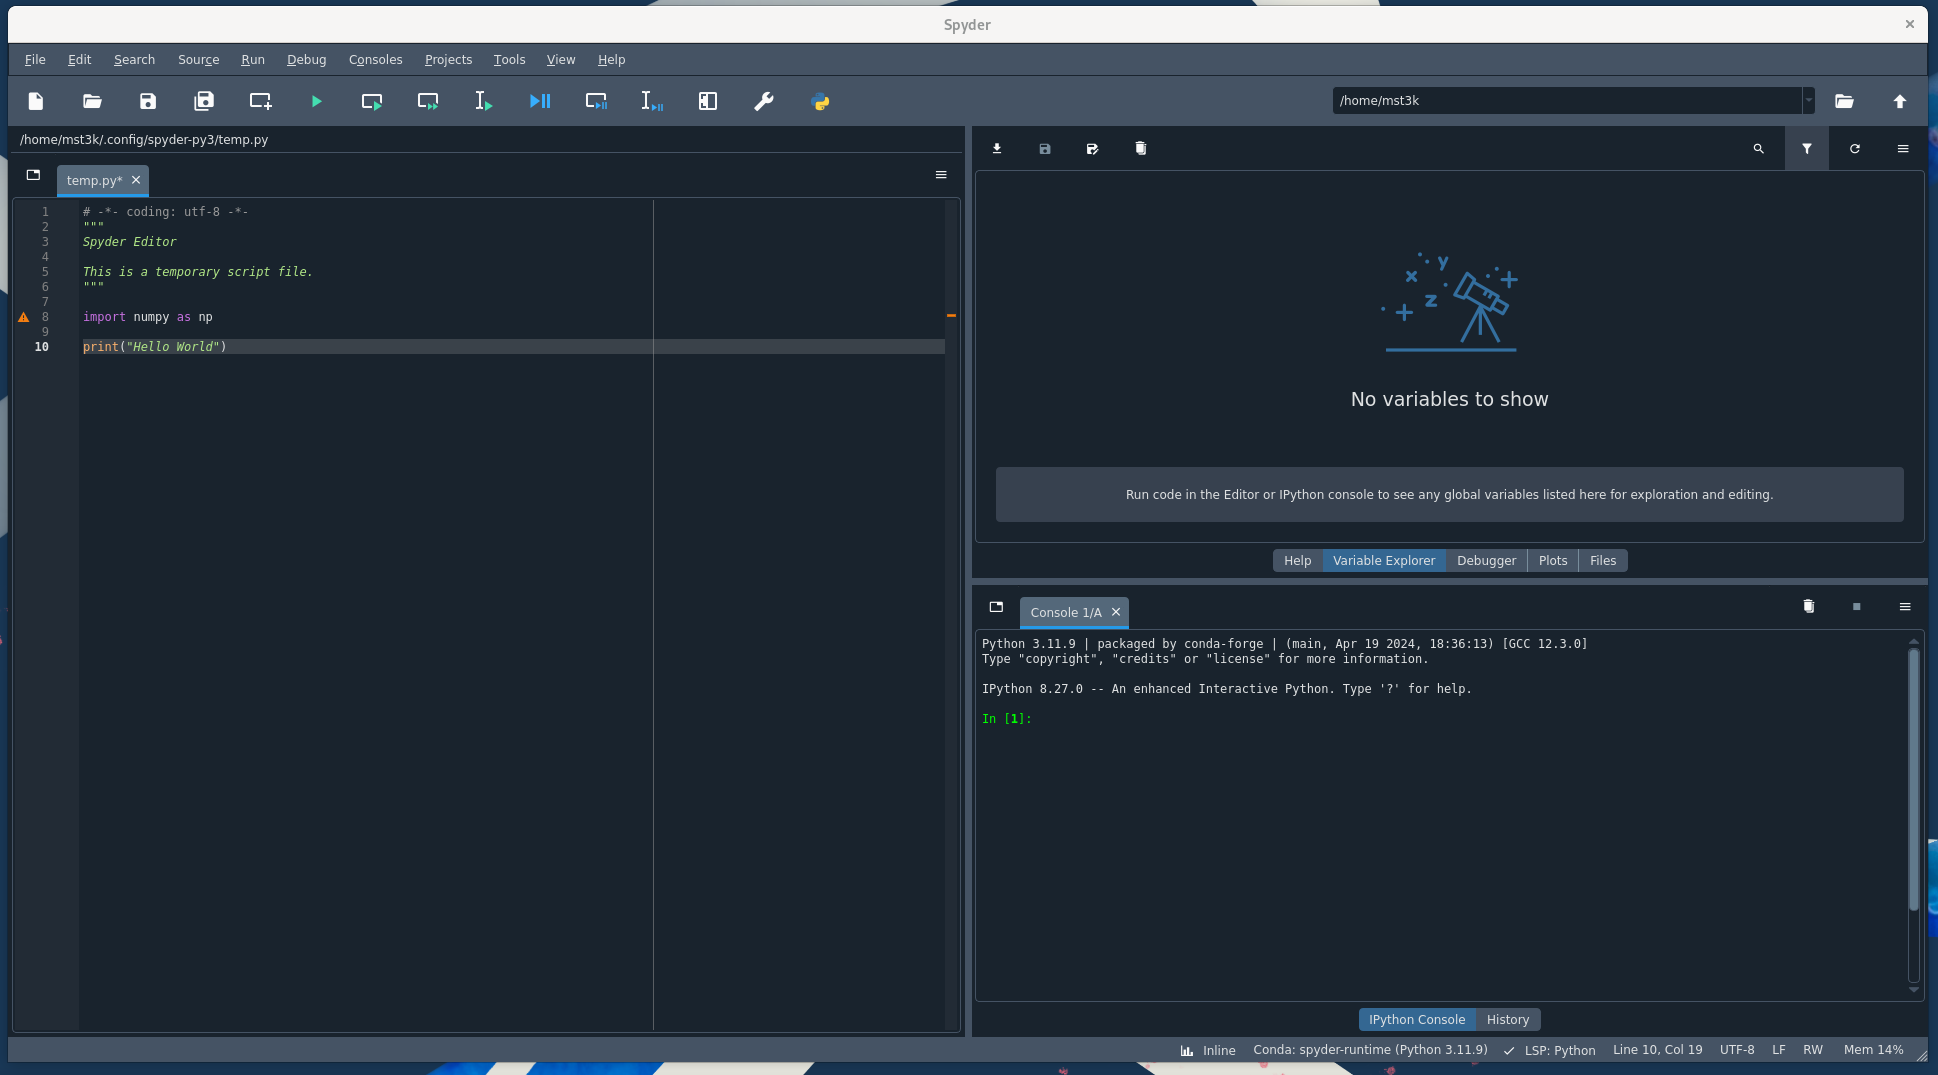
Spyder automatically inserts a few lines at the top of the editor pane for each new script. The first line, starting with the hash mark (#) is a comment and is ignored by the interpreter. After that are some lines that start and end with triple double quotes ("" "" ""). This is a special kind of string called a documentation string or docstring. We will discuss comments and docstrings
later. Start any of your scripting lines below the docstring.
If you are using Python 2.7, add the line from future import print_function immediately after the triple-quoted section at the top of the editor pane.
Type
print("Hello World")
into the editor pane. Anything entered into the editor pane is a script and you must run it as a whole in order for the command to be carried out. Click the green arrow in the top ribbon to run the current script.
You can also type commands directly into the iPython console, located by default in the lower right pane. Just as with JupyterLab, if you type an expression its value will be printed.
Type into the console:
In  [1]: x=5
In  [2]: y=7
In  [3]: x+y
Out [3]: 12
This is not the case for expressions typed into the editor pane.
x=5
y=7
x+y
We will see nothing if we run this as a script. You must add a print command to see any output as well as running the script. Expression evaluation is only available directly from an interpreter console.
In the iPython console we can also use up-down arrow keys to scroll through our commands, and right-left arrows to edit them.
Example
We can see some of these features in action by creating a simple plot. After the triple double quotes in an “untitled” editor tab, type
import matplotlib.pylab as plt
First we see a yellow triangle, indicating a syntax problem – in this case, plt is imported but not used. We ignore this warning since we will be using it. As we type
x=plt.
we see the editor show us our choices from the pylab package. We can select one or keep typing. We type
x=plt.linsp
to narrow it down further. That leads us to
x=plt.linspace
The editor then pops up a box with the arguments required by linspace. Finally we type inside the parentheses
-1.*plt.pi,plt.pi,100
for a final result of
x=plt.linspace(-1.*plt.pi,plt.pi,100,endpoint=True)
(Note that we are using a different choice from the “pyplot” package in this example. As we will learn, most packages contain many functions, and the user must learn to go through the documentation.)
After this we type
y=plt.sin(x)
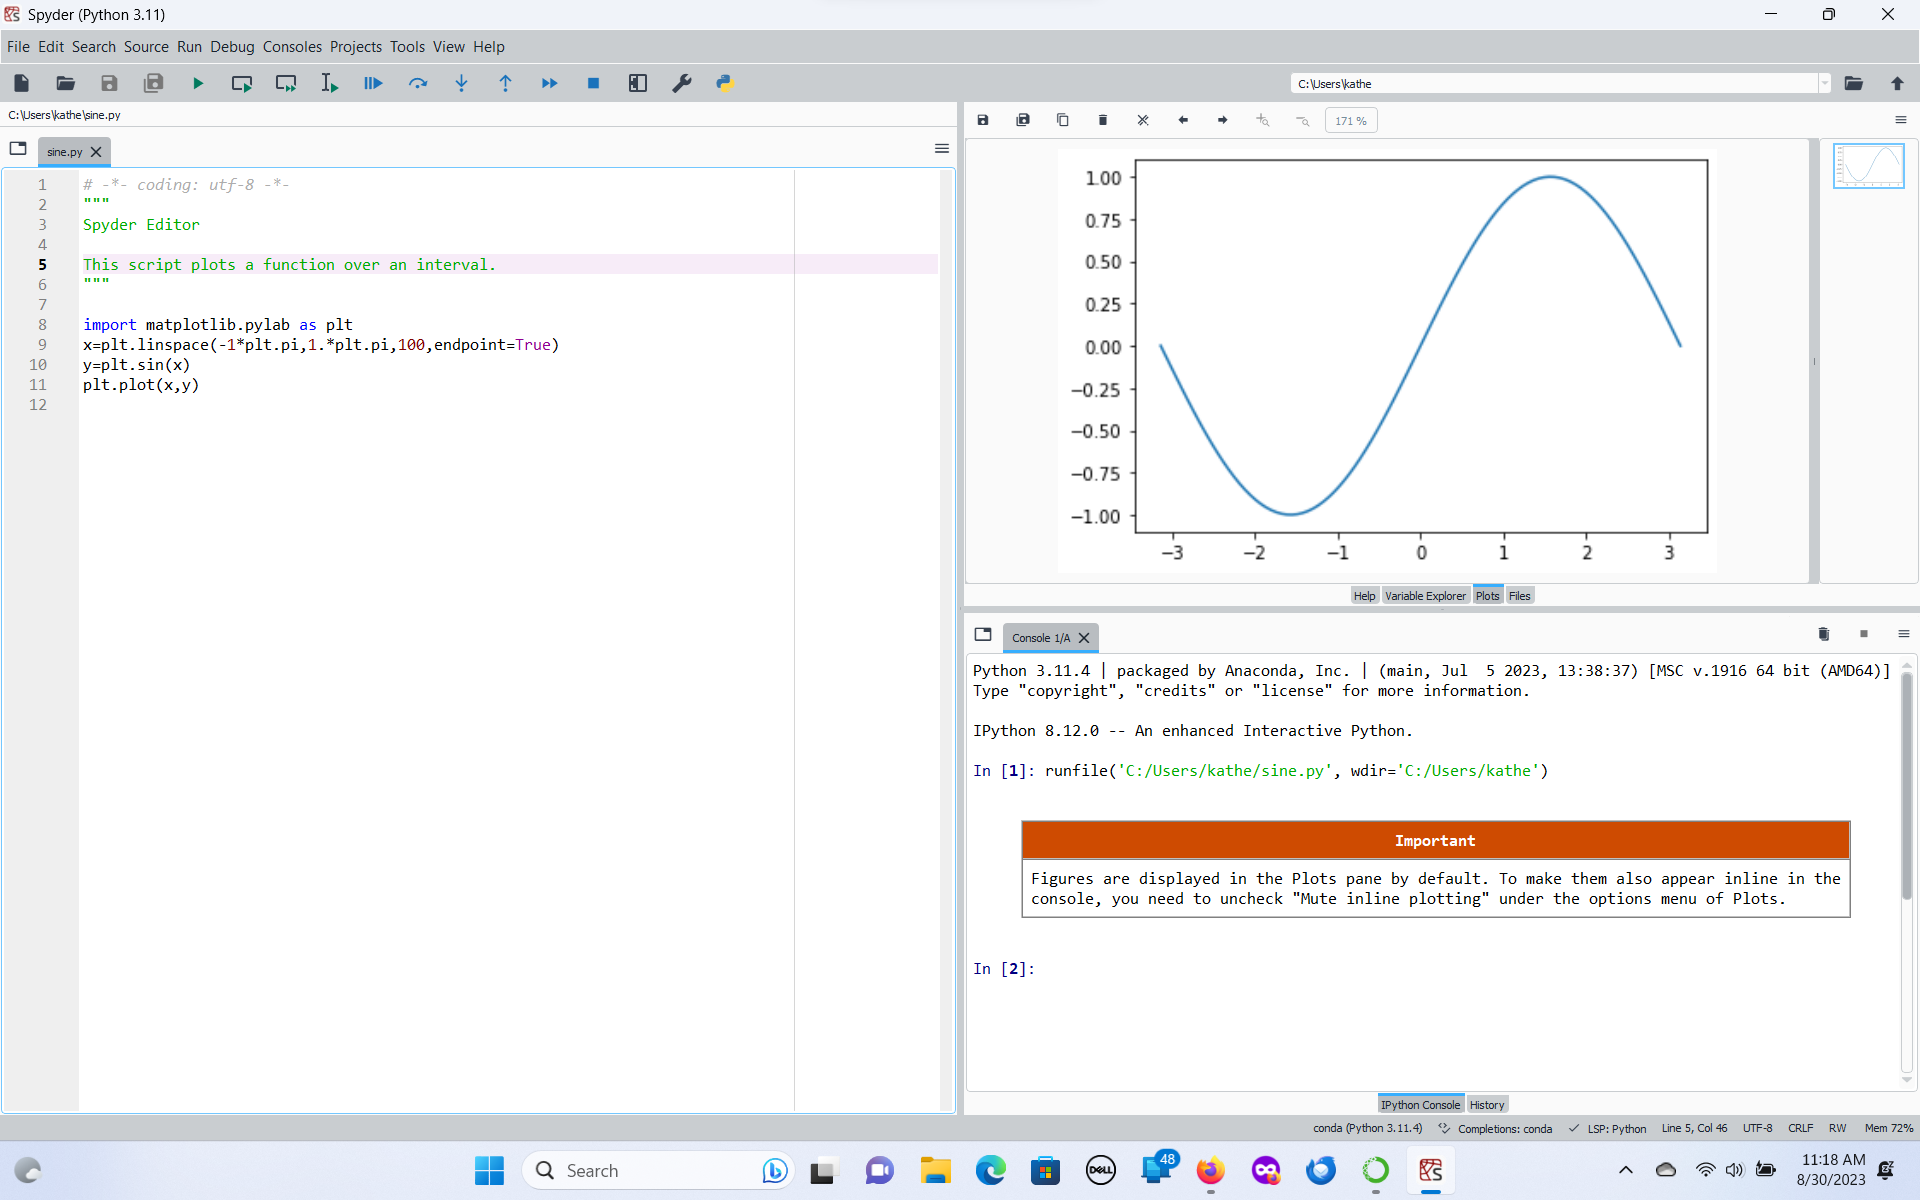
plt.plot(x,y)
You must save a file before you can run it. Go the File menu, Save As, and name it sine.py Be sure to save it to the project folder you created earlier, which will require navigating there in the file-browser window.
When we run this code, we see the plot appear in the Plots tab of the upper-right pane. We can right-click on the image to bring up a menu that allows us to save the plot.
The Variable Explorer
The Variable Explorer allows us to show the values of variables in our programs. It is particularly helpful for looking at a group of values (an array). We can examine a variable more closely by double-clicking its name to bring up a new window. In this window you can change the number of decimal places printed by clicking Format and typing in an expression such as %.3f for three decimal places. The Variable Explorer also includes icons for saving, refreshing, or importing data to our workspace.
To clear all values in the workspace, type at the iPython console
%reset
The same effect can be achieved through the trash-can icon in the Variable Explorer.
Now re-run your sine-plotting code and observe how the variables acquire values. Change sin to cos and rerun your script.
Environments in Spyder
If you are running Spyder from within an environment, it should automatically set that interpreter as its “internal” interpreter. However, if you have installed a standalone spyder, it will generally be necessary to set the Python interpreter to one of your environments, even if it a base environment, since the standalone bundle includes only the Python packages required for Spyder itself.
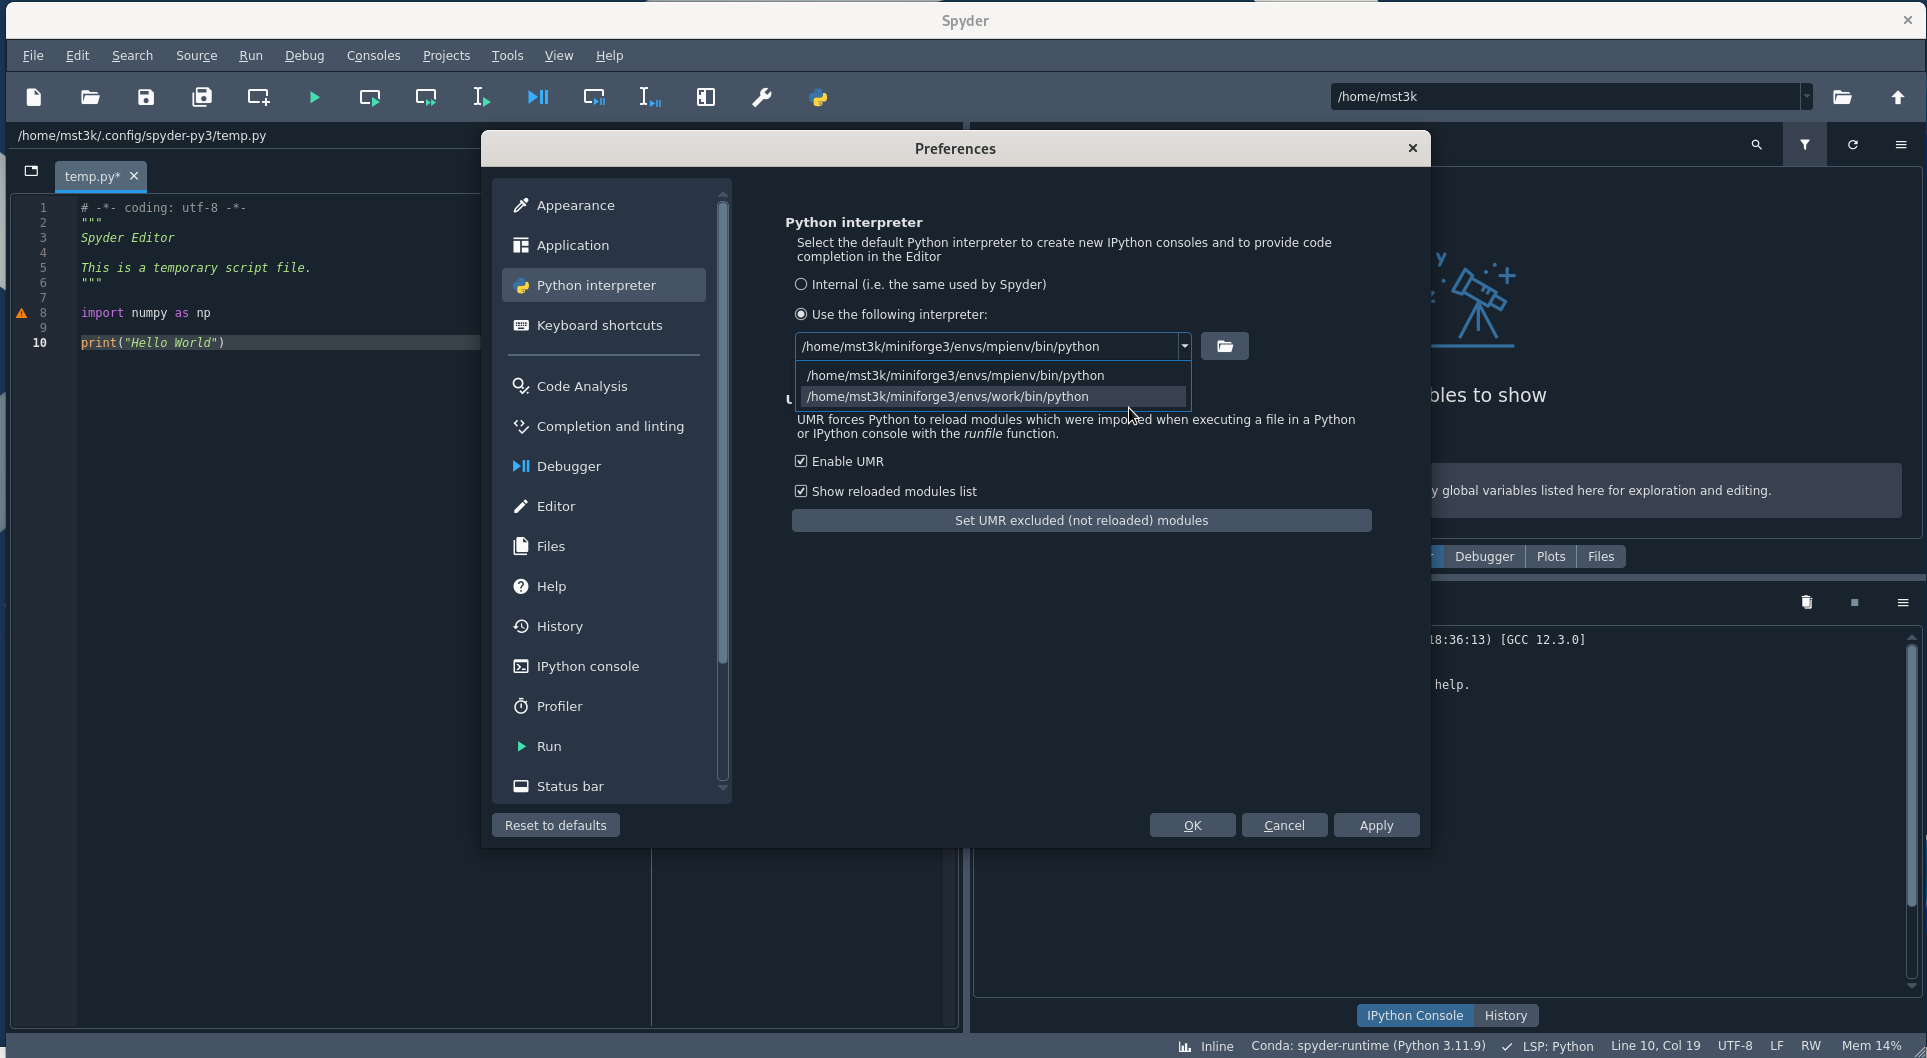
To activate a conda/mamba environment in Spyder, go to the Tools->Preferences->Python Interpreter menu. Select the “Use the following interpreter” button, then click the down arrow for the dropdown. It will see your environments as long as they are in a standard location and include the necessary support packages. Choose an environment by highlighting and clicking the path to the interpeter located in that environment; this is equivalent to activating it.
Other IDEs
Other popular IDEs for Python include the “fremium” PyCharm. The “Community” (free) edition is adequate for most casual programmer’s needs. Some organizations, such as the UVA Computer Science Department, hold licenses that students or employees can access.
VSCode is another IDE that is very popular. It is multilanguage and integrates source control with git. Full support for most languages requires the use of an extension. Extensions are installed from the Extensions menu. Click on the stacked-boxes icon, or View->Extensions from the top bar. We recommend the Python extension supported by Microsoft. It will install several Python packages for syntax checking and debugging.
The VSCode interface has some similarities to the Spyder editor pane’s interface.
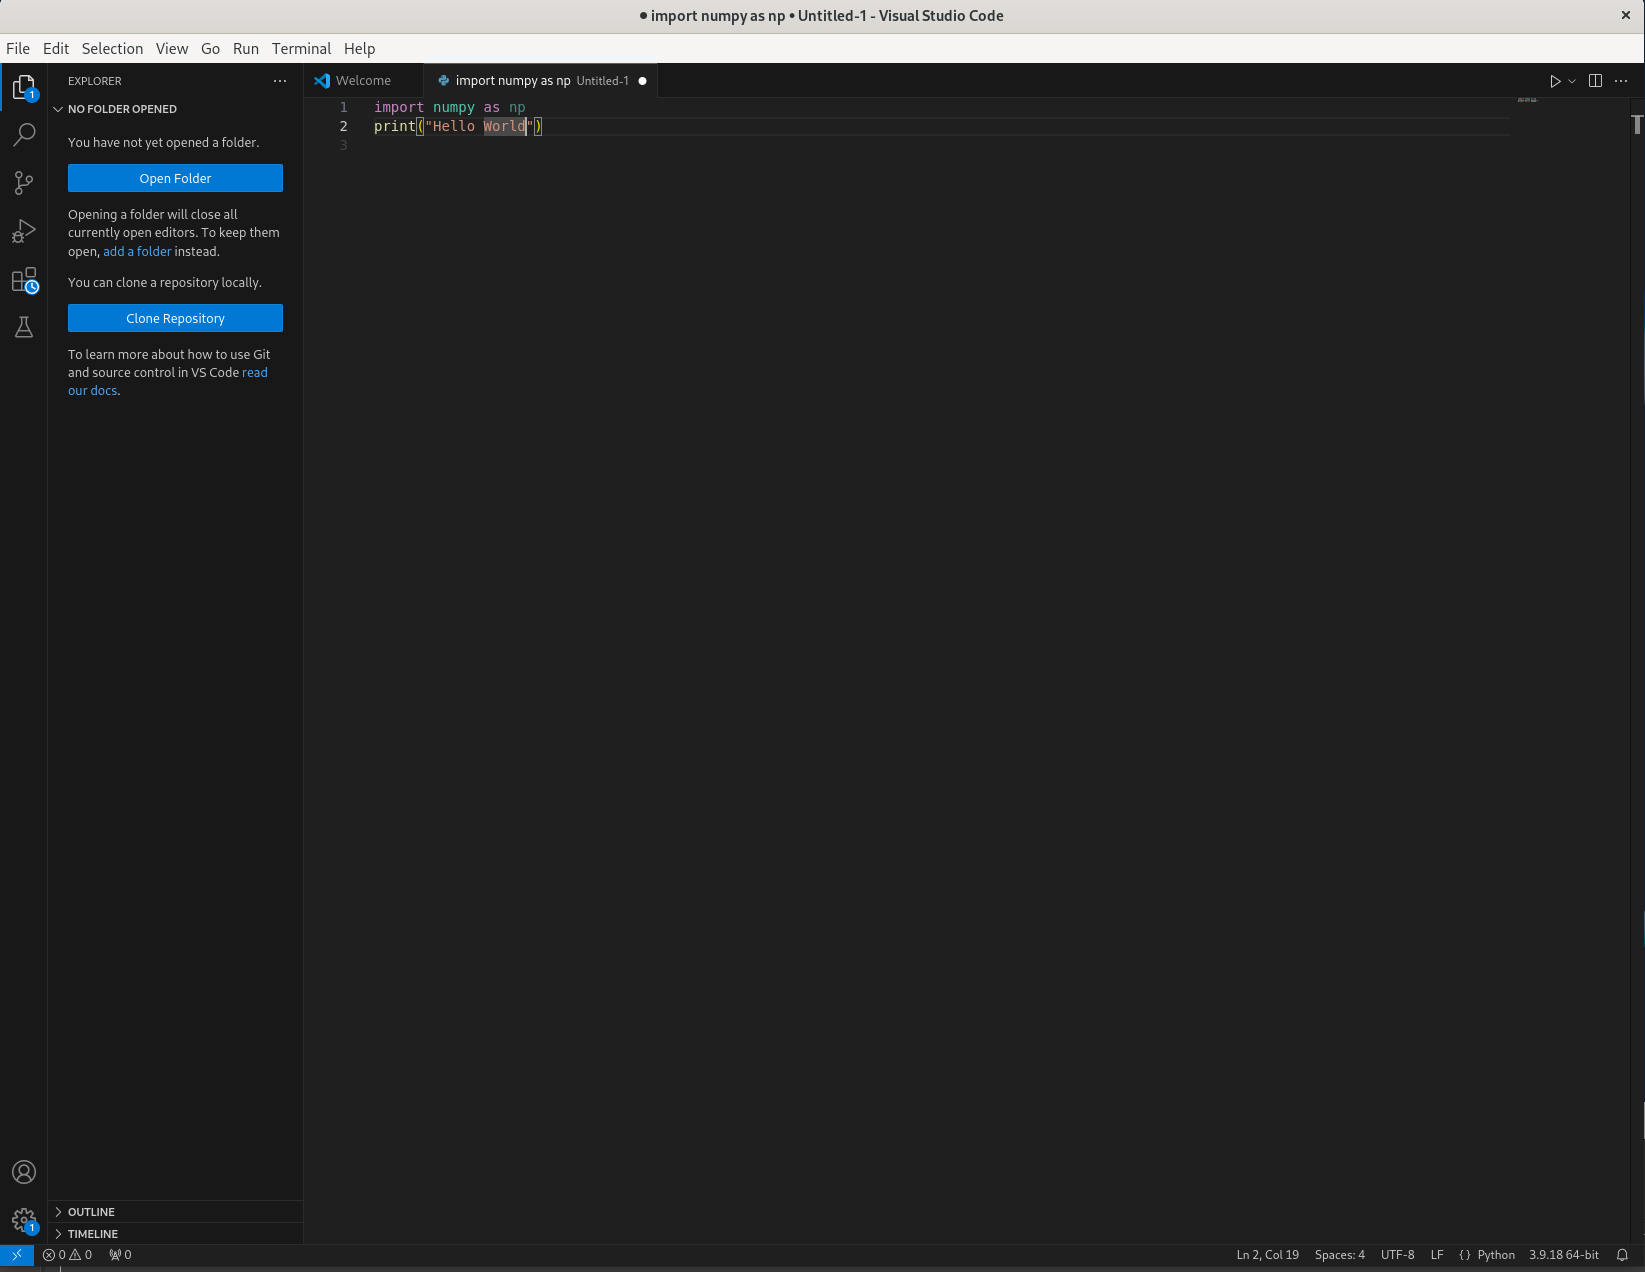
Environments are selected in VSCode in much the same way as in Spyder. Open the Command Palette with Ctrl-Shift-P. If an appropriate extension is installed, a Python: Select Interpreter dropdown will be available.
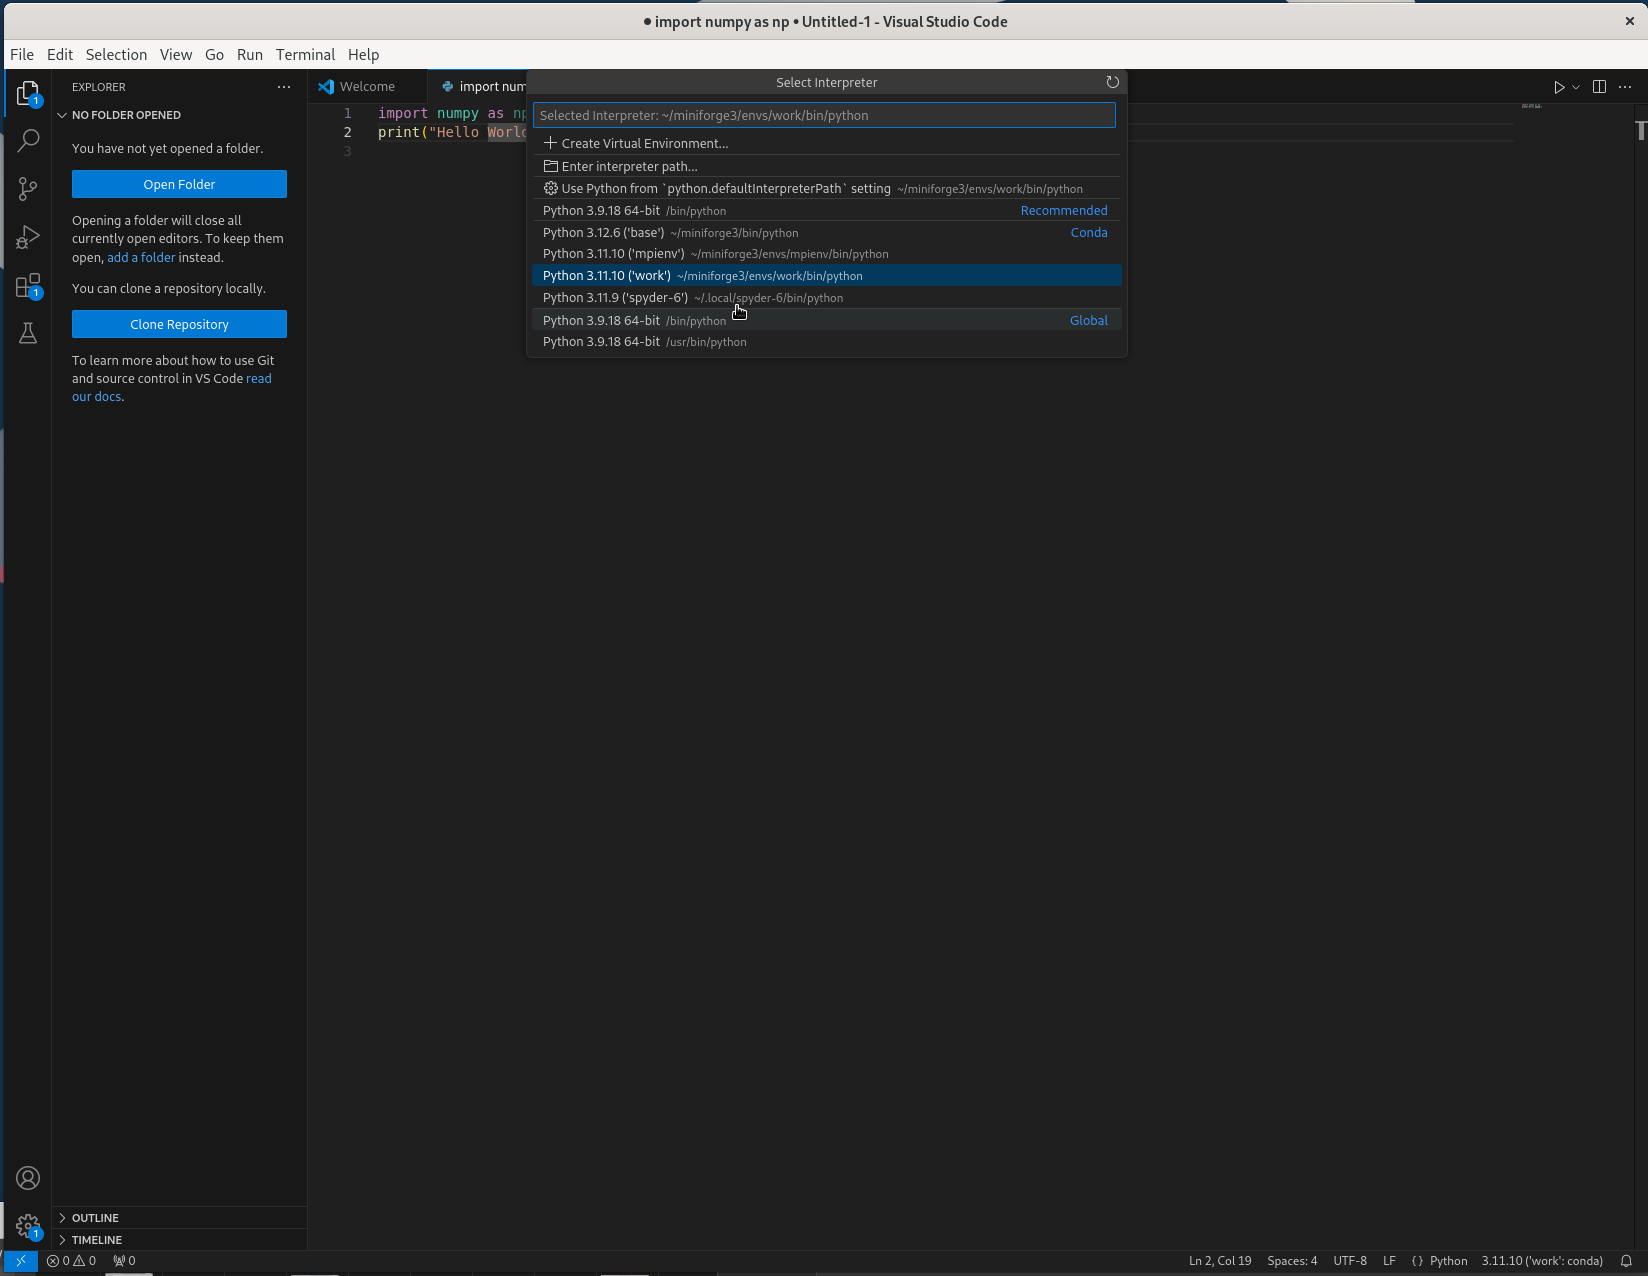
See their documentation for more details.