Script development for Image Processing with Fiji

Scripts
This chapter is an introduction to the scripting interface of the Fiji application, an open-source and enhanced version of the popular ImageJ program used for scientific image processing. Here you will learn how to write scripts for automated execution of image processing pipelines and batch processing of multiple image files in Fiji.
Step-by-step instructions are provided for developing scripts in Jython, an implementation of the popular Python language for Java platforms. Example scripts are provided for the Jython and BeanShell languages.
Introduction & Fiji Programming Tools
Installation
Fiji is a stand-alone application that can be downloaded from the Fiji website. It is available for Mac OSX, Windows, and Linux platforms.
- MacOS X: The Fiji application should be installed in the the user’s home directory rather than the default
Applicationsfolder. - Windows 7 & 10: The Fiji application should be installed in the the user’s home directory rather than the default
C:\Program Filesdirectory. - Linux: The Fiji application should be installed in a directory where the user has read, execution, and write permissions, e.g. the user’s
homedirectory.
Download the Example Scripts
Go to
this tutorials landing page and click on the Code button.
The Application Programming Interface (API)
Fiji and ImageJ are written in Java. The application programming interface (API) defines the various Java packages, classes, methods, and constants that a programmer can use for development of custom Fiji & ImageJ scripts. The API is well documented on these public sites:
Fiji provides convenient programming wrappers for these Java classes so you can write your scripts in:
- ImageJ macro language: simple, slow, not very versatile
- Jython: Python syntax with a few limitations, easy to learn, very versatile
- BeanShell: Syntax similar to Java, versatile
- Several others…
Fiji provides a richer programming environment than ImageJ and it is recommended to use Fiji instead of ImageJ for any script development.
Step-by-step instructions in this tutorial are provided for developing scripts in Jython. The download section contains scripts written in the Jython and BeanShell languages.
The Script Editor
To start the script editor in Fiji go to menu File > New > Script….
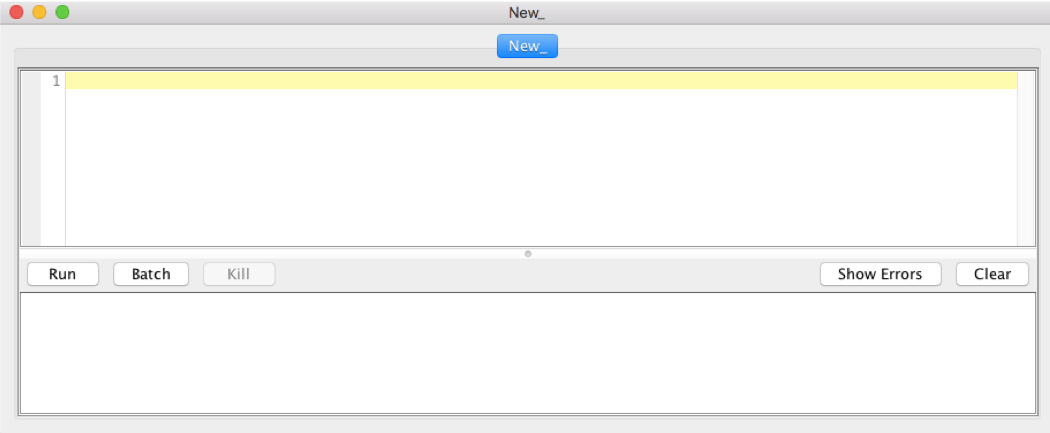
- The top pane provides the editor. Multiple scripts can be open at the same time and will show up as separate tabs.
- The bottom pane shows output (e.g. produced by print statements) and any errors encountered during script execution.
Script editor menus:
- File: Load, save scripts
- Edit: Similar to word processor functionality (Copy, Paste, etc.)
- Language: Choose language your script is written in with syntax highlighting
- Templates: Example scripts
- Tools: Access to source code of a class in the ImageJ/Fiji package
- Tabs: Navigation aid in script
The Macro Recorder
In the Fiji menu, go to Plugins > Macros… > Record.
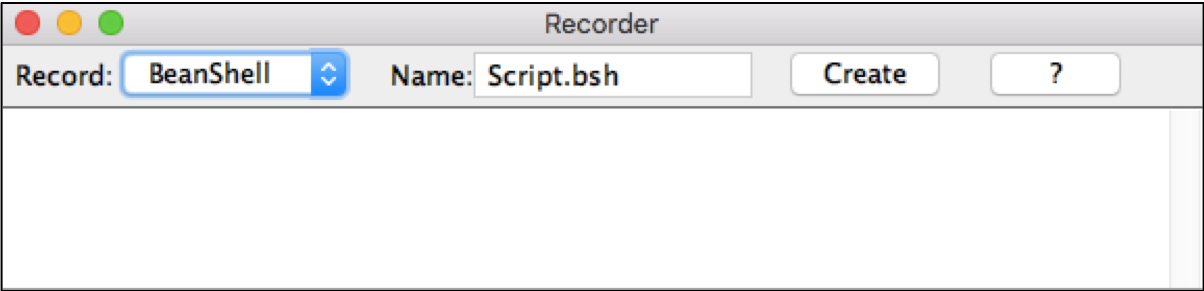
- The Macro Recorder logs all commands entered through the Fiji graphical user interface (GUI). It is useful to convert these GUI actions into script commands.
- In the
Recorddrop-down menu, selectBeanShell. - Clicking the
Createbutton copies the code to a new script in the Script Editor. - Keep the Recorder window open throughout this tutorial.
The Console Window
In the Fiji menu, go to Window > Console.
- The Console window shows the output and logging information produced by running plugins and scripts.
Jython
Jython is an implementation of the Python 2.7 programming language designed to run on the Java platform.
- Jython/Python are interpreter languages. The code is evaluated line-by-line when the script is run (executed). This is different from compiled languages.
- Some Python packages (like numpy) are not available in Jython.
- Jython scripts can use ImageJ/Fiji packages and classes via specific
importstatements. - In Python many problems can be solved with less code than in other languages. Still the code is easy to read.
Variables
A variable is used to store values or references to other objects/functions in the computer’s memory.
- Values are assigned to variables in statements with an
=. - The identifier to the left of
=defines the variable name, the expression to the right of the=defines the value to be assigned to the variable. - Variable names have to start with a letter and cannot contain any special characters, e.g.
?,,, etc.. Variable names are case-sensitive, somy_nameis not the same asMy_nameormy_Name.
Let’s create five variables, x, y, my_name, is_it_Monday, and my_list.
x = 10
y = 2.3
my_name = "Santa Claus"
is_it_Monday = False
my_list = [2,3,5,7,11]
xis assigned an integer value of10.yis a float variable, i.e. a number with decimals.my_nameis a assigned a sequence of characters, called astring. Strings are defined by enclosing single'or double"quotes.is_it_Mondayis assigned a boolean value. A boolean can be eitherTrueorFalse.my_listcontains a sequence of data elements, in this case integers. In Python/Jython, you can create lists containing elements with mixed types, even nested lists, e.g.[1.0, 'abc', 1.2, "hello"].
Conditionals: if Statements
Often different blocks of code need to be executed depending on a specific condition. This is achieved by using if, elif, else code blocks.
if <Boolean expression1>:
   statement(s)
elif <Boolean expression2>:
   statement(s)
else:
   statement(s)
Example:
x = 100
y = 200
if x < y:
    print "x is smaller than y."
elif x == y:
    print "x equals y"
else:
    print "x is larger than y"
Note:
- The
if,elif, andelsekeywords need to start at the same indentation level. Each of these lines end with a:, signifying the beginning of a new code block. - The statement(s) to be executed need to be indented by at least a single space relative to the
if,elif, andelsekeywords. - The
elifandelsestatements are optional. Multipleelifblocks can be placed between theifandelseblocks. - Any expression that evaluates to a boolean (
TrueorFalse) can be used as conditional for theifandelifstatements. - An
elifblock is only executed if all precedingifandelifconditions evaluated toFalse, and the conditional expression in thiselifstatement evaluates toTrue. - The
elseblock is only executed if all precedingifandelifconditions evaluated toFalse. - The
==is the operator to test for equality. Do not confuse it with=, which is used to assign values to variables.
Code Loops
Like most languages, Python and Jython offer loop constructs to repeatedly execute the same code block.
For loops:
for loops are executed a fixed number of iterations. It is possible to exit early but this must be added to the code.
for <item> in <iterator>:
    statement(s)
else:  # optional
    statement(s)
Example:
for i in range(20):
   print i
- The
elseclause is optional and only executed when the loop completes the iterator. - The
forandelsekeywords need to start at the same indentation levels. Each of these lines end with a:. - The statement(s) to be executed need to be indented by at least a single space relative to the
forandelsekeywords.
While loops:
while loops do not have a predetermined number of iterations. They terminate when some condition is evaluated as False.
while <Boolean expression>:
    statement(s)
else: # optional
    statement(s)
Example:
x = -20
y = -5
while (x<0 and y<0):
    print "x=", x, "y=", y
    x = x - y
    y = y + 1
else:
    print "Exited loop with: x:", x, ", y:", y
- The
elseclause is optional and executed when the loop completes the iterator. breakandcontinuestatements can be added inside the code loop to exit the loop early, or to skip to the next iteration, respectively.
Functions
A function is a code block that groups related statements that perform a specific task or job within a larger program.
- With functions, we can break down a program into a series of well-defined tasks which are easier to write and debug.
- Functions allow us to reuse code.
- Functions reduce “cut-and-paste” errors.
- If your code performs a task more than once, write a function.
In Jython and Python this could look like this:
def add_values(value1, value2):
    result = value1 + value2
    return result
- The declaration of a function starts with the keyword
deffollowed by the function’s name (i.e.add_values) and a list of parameters (i.e.(value1,value2)). - The content of the function is defined by the indented code block following the
deffunction declaration. Consistent indentation (with spaces) is required in order for the Interpreter to figure out what lines are part of this function. - The
returnstatement defines values that are passed to the code block that invoked execution of the function, i.e. the caller. If noreturnstatement is defined, the function returnsNone.
Example for invocation of the function add_values:
sum = add_values(2.3, 4.1)
print sum
- In this example we are calling the function
add_values, passing the numbers2.3and4.0as arguments. - The function performs the operation on the passed arguments and the result is stored in our custom variable
sum.
Importing packages
Just like Python, Jython provides an easy way to get access to classes and functions that are defined in external packages, outside of your script.
- The
importstatement specifies the names of external packages, classes and functions your script wants to use (thenamespace). - The ImageJ API documentation provides the Java package names and classes.
Here’s an example. Let’s say we want to use the
ImageProcessor class in our Jython script. The ImageProcessor class is defined in the ij.process Java package so the equivalent Jython import statement would look like this:
from ij.process import ImageProcessor
Script Example
Jython scripts are simple text files that use specific syntax and structure. Jython scripts (or scripts in any other programing language) should not be edited in word processing programs like Microsoft Word which add invisible formatting characters that mess with programming language syntax.
from ij import IJ

def print_info(imp):
    """This function prints basic image info."""
    print "\nTitle:", imp.getTitle() # print title

    # output image dimensions
    print "Width x Height:", imp.getWidth(), "x", imp.getHeight()

# Main code block
imp = IJ.getImage()
print_info(imp)
importstatements define code that your script needs to work but that is organized in packages/modules outside of your current script. An overview of the standard Fiji/ImageJ packages can be found here.- Indentation levels define code blocks, e.g. conditionals, code loops, functions.
- The
defkeyword defines the beginning of a function, followed by the function’s name and argument list. The content of the function is defined by the indented code block following thedeffunction declaration. - Empty lines are ignored by the interpreter but can improve readability of the code.
- The
#defines a comment. All characters following a#on that line are ignored by the code interpreter. - Text between a pair of triple quotes
"""defines a special comment type, called doc string, that is used to annotate an entire program or function.
Fiji Scripts in Jython
Images in Fiji: ImagePlus, ImageStack, ImageProcessor
- An ImagePlus object contains an ImageProcessor (2D image) or an ImageStack (3D, 4D or 5D image). It is used to show the image in a window and also includes metadata (e.g. spatial calibration, the directory/file where it was read from, acquisition info, etc.).
- The ImageProcessor contains the pixel data (8-bit, 16-bit, 32-bit float, or RGB) of the 2D image and some basic methods to manipulate it.
- An
ImageStack is a group of
ImageProcessors of the same type and size. ImageStack allows the implementation of multi-dimensional images, e.g. with
x,y,z,time, andchannelaxes.
Get Current Image
In Fiji, go to File > Open Samples > Blobs.
from ij import IJ                       # find the IJ class

imp = IJ.getImage()                     # get active Image
print "\nTitle:", imp.getTitle()        # output image title

# output image dimensions
print "Width x Height:", imp.getWidth(), "x", imp.getHeight()
- The IJ.getImage() command retrieves the image from the currently active image window in Fiji. We assign the returned
ImagePlus object to the variable
imp. - The
ImagePlus class provides numerous methods that can be accessed via the
impobject instance, e.g.imp.getTitle(),imp.getWidth(),imp.getHeight(), etc. - The
printstatement outputs Strings and values in the Script Editors console pane.
Create the script:
In the Fiji Script Editor, go through these steps:
- Create a new file (
File>New). - Go to
Languageand selectPython. - Copy the script above into the script editor.
- Go to
File>Save as...and save the file asGet_Image.py. - Click the
Runbutton.
Output:
Started Get_Image.py at Tue Jun 04 00:50:07 EDT 2019

Title: blobs.gif
Width x Height: 256 x 254
Image Dimensions
Fiji and ImageJ can handle multi-dimensional images, e.g. volumetric images or time-lapse series, up to five dimensions. Each image ( ImagePlus object) has at least two dimensions, i.e. width (x-axis) and height (y-axis). In addition, ImagePlus object can have multiple color channels, z-focal planes (called slices), and/or timepoints (called frames). Lastly, images can have different pixel encodings, e.g. 8-bit, 16-bit, 32-bit, RGB that define an image’s dynamic range (e.g. number of distinct intensity values per pixel) and color representation.
The ImagePlus class provides convenient methods to get this information.
from ij import IJ

imp = IJ.getImage()
width = imp.getWidth()            # get number of pixels along x-axis
height = imp.getHeight()          # get number of pixels along y-axis
channel_no = imp.getNChannels()   # get number of channels
slice_no = imp.getNSlices()       # get number of slices
frame_no = imp.getNFrames()       # get number of frames

bitdepth = imp.getBitDepth()      # bits per pixel
bpp = imp.getBytesPerPixel()      # bytes per pixel (there are 8 bits in a byte)
Image Calibration
Many image formats allow inclusion of image annotations (metadata) in addition to the pixel data. An important piece of information is the spatial pixel calibration, e.g. the definition of pixel size in real-world physical units. For example, a pixel may correspond to 200 nanometer in x-y dimension.
Let’s assume that we have a variable imp as reference to an
ImagePlus object. We can get and set an image’s calibration with the following
ImagePlus class methods:
Get copy of image calibration
calibration = imp.getCalibration().copy()
Set image calibration
new_imp.setCalibration(calibration)
Creating a New Image
New images can be created by initializing an ImagePlus object with an ImageProcessor object instance. The following ImageProcessor subclasses can be used, depending on bit-depth and color mode of the desired image.
| ImageProcessor subclass | Mode | bits/pixel |
|---|---|---|
| ByteProcessor | grayscale | 8-bit int |
| ShortProcessor | grayscale | 16-bit int |
| FloatProcessor | grayscale | 32-bit float |
| ColorProcessor | color | 8-bit int per channel |
Example
from ij.process import ByteProcessor, ShortProcessor,  \
                                     FloatProcessor, ColorProcessor
from ij import ImagePlus

width = 200                                  # in pixel
height = 100                                 # in pixel
bp = ByteProcessor(width, height)            # create ImageProcessor
imp_bp = ImagePlus("New 8-bit image", bp)    # create ImagePlus with specific title and ImageProcessor object
imp_bp.show()                                # show image window

sp = ShortProcessor(width, height)
imp_sp = ImagePlus("New 16-bit image", sp)
imp_sp.show()

fp = FloatProcessor(width, height)
imp_fp = ImagePlus("New 32-bit image", fp)
imp_fp.show()

cp = ColorProcessor(width, height)
imp_cp = ImagePlus("New RGB image", cp)
imp_cp.show()
This script creates four new images, each with 200 x 100 pixels but with different pixel encodings. Take a look at each image window’s header and note the differences.

- Pixel encoding (8-bit, 16-bit, 32-bit, RGB).
- Memory footprint in kilobytes (20K, 39K, 78K, 78K).
Duplicating an Image
The Duplicator class provides a convenient way to create an exact copy of an existing ImagePlus object.
from ij import IJ
from ij.plugin import Duplicator

imp = IJ.getImage()
copied_imp = Duplicator().run(imp)
copied_imp.show()
Note that the duplicated image will be named DUP_<original_title>. You can change the title with the setTitle(string) method.
copied_imp.setTitle("Perfect copy")
Opening and Saving Image Files
Open Images
Fiji can read many different image file formats. This versatility is now provided via the integrated Bio-Formats plugin.
| Class/Method | Behavior |
|---|---|
| IJ.open() | interactive dialog |
| IJ.openImage() | non-interactive, using default image display |
| loci.formats.ImageReader | non-interactive, configurable image display |
Save Images
Fiji can also save image files in various common formats, including TIF, OME-TIF, BMP, PNG, JPEG, AVI, etc.).
| Class/Method | Behavior |
|---|---|
| ij.io.FileSaver | interactive dialog |
| IJ.saveAs () | non-interactive, simple image writer (TIF, JPEG, GIF, PNG, etc.) |
| loci.formats.ImageWriter | non-interactive, advanced with many formats |
Interactive Image Opening and Saving (with Dialog)
from ij import IJ
from ij.io import FileSaver
Open file (interactive dialog)
imp = IJ.open()
imp = IJ.getImage()
imp.setTitle("copy.tif")
Save file in original format (interactive dialog)
fs = FileSaver(imp)
fs.save()        # could also use fs.saveAsTiff(), fs.saveAsPng(), etc.
Non-interactive Image Opening and Saving (without Dialog)**
from ij import IJ
import os
from os import path

# Open file from URL or storage device (non-interactive)
filesource = "http://imagej.nih.gov/ij/images/blobs.gif"
imp = IJ.openImage(filesource)
imp.show()

# Create new output directories and filename
homedir = path.expanduser("~")				# home directory
outputdir = path.join(homedir, "workshop", "images")	# full dir path
print outputdir
if not path.isdir(outputdir):
    os.makedirs(outputdir)

# Save file as .tif (non-interactive)
outputfile = os.path.join(outputdir, "blobs-copy.tif")
IJ.saveAs(imp, "tiff", outputfile)
print "Saved file:", outputfile
Check the output in the console window. The image should have been saved to the workshop/images subdirectory in your home directory.
If you cannot find your saved file, try this:
- Click on the
blobs-copy.tifimage window, - Go to
Image>Show Info…. - View path entry in
Info for blobs-copy.tifwindow.
Note that file paths use \ on Windows but / on Linux and OSX platforms. Avoid hardcoding the \ or / and use
os.path functions to create platform appropriate path names.
IJ.run
The IJ.run command can be used to execute many of the commands available through the Fiji graphical user interface.
Basic syntax: IJ.run(image, command, option)
- image : reference to ImagePlus object
- command : String
- option : String, in some cases just
""(empty String)
The
Macro Recorder is an excellent tool to convert a function accessible via the Fiji menu into an IJ.run statement. Let’s try it.
Record
- Ensure that the
Macro Recorder window is open. If not, go to
Plugins>Macro>Recorder. - In the Recorder window’s
Recorddrop-down menu, selectBeanShell. - In the Recorder window select and remove any code.
- In Fiji, go to
File>Open Samples>Boats - Go to
Process>Filters>Gaussian Blur, a dialog will pop up:- Enter a
Sigma valueof5. - Click
Ok.
- Enter a
- Go to
File>Save As…>Tiff. - Browse to your
workshop/imagesdirectory (if it does not exist yet, create it), useblurry_boats.tifas file name and clickSave. - In the Recorder window, click
Create. This should bring up the Script Editor window with a new script file containing the code copied from the Recorder. If you see more than three lines of code, remove everything that starts beforeimp = IJ.openImage(…..
Convert to Jython script
- In the
Script Editor , go to
Language, and selectPython. - Insert an
from ij import IJstatement at the top of the script. - Remove semicolons (
;) at the end of the last three lines so your script looks like this (ignore the file path; yours will be different):
from ij import IJ

imp = IJ.openImage("http://imagej.nih.gov/ij/images/boats.gif")
IJ.run(imp, "Gaussian Blur...", "sigma=5")
IJ.saveAs(imp, "Tiff", "/Users/mst3k/blurry_boats.tif")
- Save your script as
IJ_Run.py. Close all image windows. - Run the script.
Check your workshop/images directory for the blurry_boats.tif file.
Working with ImageStack
In Fiji, go to File > Open Samples > Mitosis. This image has the following dimensions:
- 2 Channels
- 5 Focal Planes (Slices, Z)
- 51 Timepoints (Frames)
The multi-dimensional image (represented by an
ImagePlus object imp) contains an
ImageStack object to manage the different image planes. An ImageStack contains a group of
ImageProcessors of the same type and size.
The ImageStack object of an ImagePlus object (imp) can be retrieved like so:
stack = imp.getStack()
The following code provides a reference to the
ImageProcessor for a particular channel, slice, and frame in the imp
ImagePlus object:
index = imp.getStackIndex(channel_no, slice_no, frame_no)
stack = imp.getStack()
ip = stack.getProcessor(index)
Conversely, we can replace an ImageProcessor in an ImageStack (referenced by the stack variable) like so:
stack.setProcessor(new_ip, index) # provide new ImageProcessor object, and stack position to place it
Important: The new ImageProcessor object has to be of the same type, width, and height as all the other ImageProcessors in the stack.
Regions-of-Interest (ROIs)
ROIs define groups of pixels in an image. An ROI can be used to:
- Measure pixel values
- Change pixel values
- Mark image regions in non-destructive overlays (without changing pixel values)
ROI Types (classes):
- Roi
- Line
- OvalRoi
- PolygonRoi
- ShapeRoi
- TextRoi
- ImageRoi
ROIs can be managed directly or through the RoiManager class.
ROI: Cropping an Image
In Fiji, go to File > Open > Samples > Clown
from ij.gui import Roi
from ij import IJ
from ij.plugin import Duplicator

# get current image
imp = IJ.getImage()

# create rectangular ROI centered in image
rel_size = 0.5					# 0.0 < rel_size < 1.0
width = int(rel_size * imp.getWidth())
height = int(rel_size * imp.getHeight())
top_left_x = int(0.5 * (imp.getWidth() - width))
top_left_y = int(0.5 * (imp.getHeight()- height))
roi = Roi(top_left_x, top_left_y, width, height)

# copy image, set ROI on copied image, crop, set title and show image
cropped_imp = Duplicator().run(imp)
cropped_imp.setRoi(roi)
IJ.run(cropped_imp, "Crop", "")		# modifies passed ImagePlus object!
cropped_imp.setTitle('Cropped')
cropped_imp.show()
Run the script in the Script Editor.
Fill ROI with a Given Value
from ij import IJ, ImagePlus
from ij.process import FloatProcessor
from array import zeros
from random import random
from ij.gui import Roi, OvalRoi

# Create a new ImagePlus filled with noise
width = 1024
height = 1024
pixels = zeros('f', width * height)
for i in xrange(len(pixels)):
    pixels[i] = random()
fp = FloatProcessor(width, height, pixels)
imp = ImagePlus("Random", fp)

# Fill a rectangular region of interest with a value of 2.0
roi = Roi(40, 100, 400, 300)
fp.setRoi(roi)
fp.setValue(2.0)
fp.fill()

# Fill a oval region of interest with a value of -2.0
oroi = OvalRoi(500, 300, 150, 550)
fp.setRoi(oroi)
fp.setValue(-2.0)
fp.fill(oroi.getMask())  # Attention! Required for non-rectangular ROIs

imp.show()
Changing ROI Properties
The appearance of an
ROI object (roi) can be changed.
Border Color
from java.awt import Color
roi.setStrokeColor(Color.RED)
Border Width
roi.setStrokeWidth(2.0)
Fill Color
from java.awt import Color
roi.setFillColor(Color.YELLOW)
Set ROI Position
The positioning of an ROI object (roi) can be set for a specific channel, slice, frame in a given image (imp) with multi-dimensional
ImageStack.
index = imp.getStackIndex(channelNo, sliceNo, frameNo)
roi.setPosition(index)
Note: If index is 0 (default), the Roi applies to all image planes in the stack.
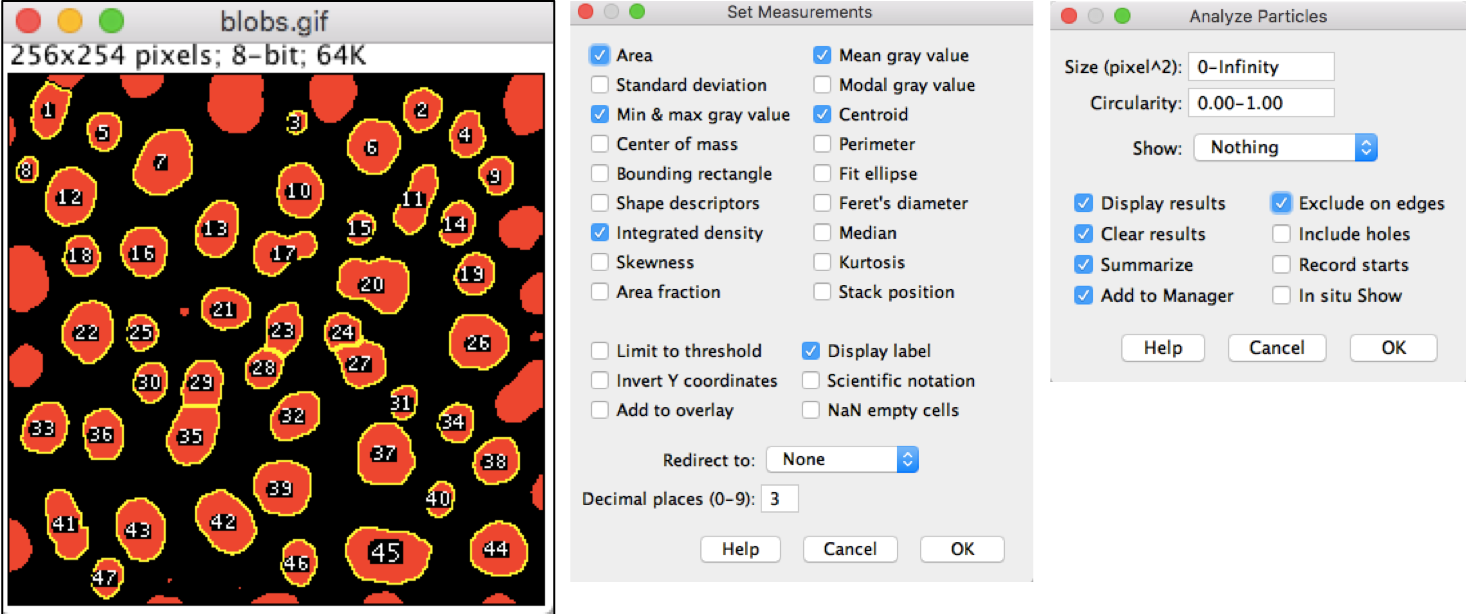
Particle Analysis
- In the
Macro Recorder window’s
Recorddrop-down menu, selectBeanShell. Remove any code. - In Fiji, go to
File>Open Samples>Blobs - Go to
Process>Filters>Median…- Set
Radius: 2 - Click
Ok.
- Set
- Go to
Process>Binary>Options…- Check
Black backgroundbox. - Click
OK.
- Check
- Go to
Image>Adjust Threshold…- Select
DefaultandRedin drop-down menu - Uncheck
Dark backgroundbox. - Click
Apply.
- Select
- Go to
Process>Binary>Watershed - Go to
Analyze>Set Measurements- Select options as shown.
- Click
Ok.
- Go to
Analyze>Analyze Particles…- Select options as shown.
- Click
Ok.
Convert the Macro recordings into a Python script, remember to do the following in the Script Editor:
- In the Script Editor, go to
Language, and selectPython. - Insert an
importstatement at the top the script - Remove semicolons (
;) at the end of the lines.
The script should look like this:
from ij import IJ

imp = IJ.openImage("http://imagej.nih.gov/ij/images/blobs.gif")
IJ.run(imp, "Median...", "radius=2")
IJ.run(imp, "Options...", "iterations=1 count=1 black")
IJ.setAutoThreshold(imp, "Default")
IJ.run(imp, "Convert to Mask", "")
IJ.run(imp, "Watershed", "")
IJ.run(imp, "Set Measurements...", "area mean min centroid integrated display redirect=None decimal=3")
IJ.run(imp, "Analyze Particles...", "size=0-Infinity display exclude clear summarize add")
imp.show()
Save the script as Blob_Analysis.py, and run the script.
You should see the following results tables.

RoiManager
The
RoiManager class implements the Analyze > Tools > ROI Manager function. The Particle Analyzer can also use the Roi Manager to store ROIs identified during the analysis, see
Particle Analysis.
Using the RoiManager class in scripts:
Get reference to system default instance
from ij.plugin.frame import RoiManager
rm = RoiManager.getInstance2()
Get number of ROIs managed by RoiManager
count = rm.getCount()
Get all ROIs as a list
rois = rm.getAllRoisAsArray()
Get specific ROI at specific index position
roi = rm.getRoi(index)
Remove all ROIs
rm.reset()
Add ROI
roi = OvalRoi(100, 150, 50, 50)
rm.addRoi(roi)
Run operation on ROI: combine, select, save, open, etc.
rm.runCommand(command_string)
ImageStatistics
The ImageStatistics class provides access to pixel-based statistics, including the histogram, of an entire image or ROI selection in an image.
Common statements:
Define measurement options: bitwise OR combination of constants
from ij.process import ImageStatistics as IS
options = IS.MEAN | IS.AREA | IS.STD_DEV  # many others
Measure entire image (imp) ``` imp.setRoi(null) # remove any ROI from image stats = imp.getStatistics() ```
Measure particular ROI (roi) in image (imp) ``` imp.setRoi(roi) stats = imp.getStatistics() ```
Get histogram for image (imp) as a list of intensity counts: ``` stats = imp.getStatistics() histo_values = stats.getHistogram() ```
ResultsTable
The ResultsTable class is used for storing measurement results and strings as columns of values.
Common statements:
Get default table used by Analyze > Measure
from ij.measure import ResultsTable
rt = ResultsTable.getResultsTable()
Create new empty table
rt = ResultsTable()
Show table with title. The title Results is reserved for default table for Analyze > Measure.
rt.show("My Results") # passed argument becomes table title
Get number of table rows
rt.getCount()
Get list of float values in column (by column header)
col_index = rt.getColumnIndex("Area")
rt.getColumn(col_index)
Add value to specific column in last row
rt.addValue("Area", 23.0)
Delete column
rt.deleteColumn("Area")
Delete row (by row index)
rt.deleteRow(row_index)
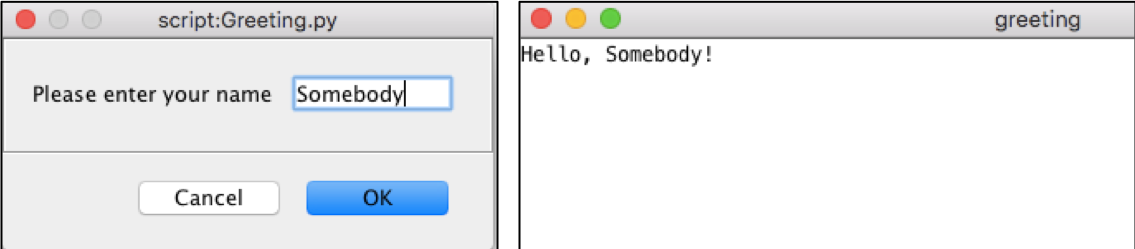
Custom Dialog Windows: Collecting User Input
Custom language agnostic dialogs can be created using the SciJava@Parameter annotation.
- Script parameters are a feature of ImageJ2; they will work in Fiji but will not work in plain ImageJ1.
- Basic Syntax:
- Parameter declarations begin with
#@. Each such line contains a single parameter declaration or script directive and nothing else. #@ Type variableNamewill declare an input of the indicated type, assigned to the specified name. The use of a space between #@ and Type is encouraged, but not required.#@output Type outputNamewill declare the variable of the specified name as an output parameter with the given type. The Type parameter is optional, as the output will be treated as Object be default. (For the output directive and other script directives, no space is allowed between#@and the directive.)
- Parameter declarations begin with
| Data type | Widget type | Available styles |
|---|---|---|
| boolean / Boolean | checkbox | |
| byte / short / int / long | numeric field | slider / spinner / scroll bar |
| Byte / Short / Integer / Long | numeric field | slider / spinner / scroll bar |
| Float | numeric field | slider / spinner / scroll bar |
| BigInteger / BigDecimal | numeric field | slider / spinner / scroll bar |
| char / Character / String | text field | text field / text area / password |
| Dataset | ImagePlus | (>=2 images) triggers a dropdown list |
| ColorRGB | color chooser | |
| Date | date chooser | |
| File | file chooser | open / save / file / directory / extensions |
Source: https://imagej.net/Script_Parameters
Example:
# @String(label="Please enter your name",description="Name field") name
# @OUTPUT String greeting

greeting = "Hello, " + name + "!"
When you run the script, a dialog will pop up asking for your input. Type in a name (any character sequence) and click OK. The output message will be shown in a separate window.
Batch Processing of Image Files
Often we want to apply the same image processing method to a set of images.
- It is convenient to organize such image files into a single directory or group of directories.
- We already created a series of images and saved them in the workshop/images directory. Let’s produce a simple batch processing script that applies a Gaussian filter to all images in that directory.
Simple Template:
# @ File (label="Input directory", style="directory") inputdir
# @ File (label="Output directory", style="directory") outputdir

from ij import IJ
import os
from os import path

def process_file(f):
    print "Processing", f
    imp = IJ.openImage(f)
    IJ.run(imp, "Gaussian Blur...", "sigma=2");
    return imp

def save_as_tif(directory, image):
    title = image.getTitle().split(".")[0] + "-blurred.tif"
    outputfile = path.join(outputdir, title)
    IJ.saveAs(image, "TIFF", outputfile)
    print "Saved", outputfile

# Main code
inputdir = str(inputdir)
outputdir = str(outputdir)
if not path.isdir(inputdir):
    print inputdir, " is does not exist or is not a directory."
else:
    if not path.isdir(outputdir):
        os.makedirs(outputdir)
    filenames = os.listdir(inputdir)
    tif_files = [f for f in filenames if f.split(".")[-1] == "tif"]
    for tif_file in tif_files:
        fullpath = path.join(inputdir, tif_file)
        imp = process_file(fullpath)
        save_as_tif(outputdir, imp)
    print "Done.\n"
Installing Scripts as Plugins
Once you have completed script development, you can install the script in Fiji. It will show up as a selectable entry in the Plugins menu.
- Note: Your script name needs to include at least one underscore (
_). Example:Basic_Crop.py
There are two install options:
- Option A) Manual process:
- Copy the script to the
pluginsdirectory in your Fiji install tree. You can create a subdirectory inplugins(e.g. plugins/workshop) and place your script there if you like to group related scripts.
- Copy the script to the
- Option B) Fiji installer:
- In Fiji, go to
Plugins>Install…. - In the first pop-up dialog browse to and select the script. Click
Open. - In the second dialog window, select the plugins directory (or a subdirectory within plugins) to where the script should be installed. Click
Save.
- In Fiji, go to
After installing the script as plugin, restart Fiji.
Go to File > Plugins and verify that the script is available. The _ and file extension are stripped from the plugin name. Example: Basic_Crop.py is installed as Basic Crop
Exercises
Beginner
Project 1: Modify the
Get Current Image example script to print the number of channels, number of focal planes (z), and number of timepoints. Open images of your choice from Fiji > Open Samples and compare the output when running the script.
Project 2: Open the Macro Recorder, delete any code in the recorder pane. Record the following steps and convert the macro recording into Jython script. Hint: IJ.run
- Go to
File>Open Samples>Fluorescent Cells. - Split the channels (Image > Color > Split Channels).
- Merge the channels again as
Compositeimage, but swap the red and green channel.
Project 3: Implement the crop ROI example script with functions.
Project 4: Modify the processing function in Batch Processing example script to apply a different image filter. Hint: IJ.run
Intermediate
Project 5: Modify the crop ROI example script to have it create multiple cropped images of various sizes in a code loop. Hint: For loops
Project 6: Modify the processing function in
Batch Processing example script to prompt user for sigma value to be used by the Gaussian filter.
Hint: Custom Dialog Windows. The custom sigma value should be passed from the main code block as an argument to the process function.
Hint: Functions
Project 7: Let’s try to improve the particle analysis by implementing the following features:
- Duplicate the original image: Duplicator class
- Access to ROIs identified by Particle Analyzer: RoiManager class
- Measuring area, pixel intensities, etc. for each ROI: ImageStatistics class
- Creating a customized results table and save it: ResultsTable class
- Custom Dialog for User Input to specify particle size: Custom User Dialogs
# @ Float (label="Min particle size", value=50) min_size
# @ Float (label="Max particle size", value=200) max_size
# @ Boolean (label="Save ROIs", value=false) save_rois
# @ File (label="Output directory", style="directory") outputdir

from ij import IJ
from ij.plugin import Duplicator
from ij.plugin.frame import RoiManager
from ij.measure import ResultsTable
from ij.process import ImageStatistics as IS
from os import path

# open image and create copy
original = IJ.openImage("http://imagej.nih.gov/ij/images/blobs.gif")
original.show()
imp = Duplicator().run(original)
imp.setTitle("Mask")                           # rename the copy

IJ.run(imp, "Median...", "radius=2");
IJ.run(imp, "Options...", "iterations=1 count=1 black")
IJ.setAutoThreshold(imp, "Default")
IJ.run(imp, "Convert to Mask", "")
IJ.run(imp, "Watershed", "")                   # break up particle clumps
IJ.run(imp, "Set Measurements...", "area mean min centroid integrated display redirect=None decimal=3")
# hardcoded: "size=50-Infinity display exclude clear summarize add"
moptions = "size=" \
	+ str(min_size) + "-" + str(max_size) \
	+ " display exclude clear summarize add"
IJ.run(imp, "Analyze Particles...", moptions)
imp.show()

# get default instance of RoiManager(used by ParticleAnalyzer)
rm = RoiManager.getInstance2()

# get list of all ROIs
rois = rm.getRoisAsArray()

# set measurement options
options = IS.MEAN | IS.AREA | IS.CENTROID

# create Results Table
rt = ResultsTable()

# iterate over all ROIs
for roi in rois:
    original.setRoi(roi)
    stats = original.getStatistics(options)      # measure
    rt.incrementCounter()                        # advance row counter

    # add values to various columns
    rt.addValue("Label", original.getTitle())
    rt.addValue("Mean", stats.mean)
    rt.addValue("Area", stats.area)
    rt.addValue("Centroid X", stats.xCentroid)
    rt.addValue("Centroid Y", stats.yCentroid)

# show custom table
rt.show("Blob Results")

# save contents of ResultsTable object as .csv file
outputdir = str(outputdir)
resultsfile = path.join(outputdir, "blobs.csv")
print "Results file:", resultsfile
rt.saveAs(resultsfile)

if save_rois:
    roifile = path.join(outputdir, "blobs-rois.zip")
    rm.deselect()                                # ensure all ROIs rather than selected are saved
    rm.runCommand("Save", roifile)
Expert
Project 8: Modify the processing function in Batch Processing example script to apply a median filter to a circular shaped ROI in the center of the image. The ROI diameter should be half of the width or height (whichever is smaller) of the image. The radius of the median filter should be requested from the user. Hint: Setting ROI, Hint: Recording filter functions, Hint: Custom Dialog Windows
Project 9: Let’s create a script that performs the following operations on a multi-dimensional ImageStack:
- Extract the central focal image planes of the last channel for all timepoints.
- Save each extracted image plane as a separate .tif image file in a designated directory.
- The pixel size calibration of the original image should be retained in each saved image plane.
from ij import IJ
from ij import ImagePlus
import os
from os import path

imp = IJ.openImage("http://imagej.nih.gov/ij/images/Spindly-GFP.zip")
channel_no = imp.getNChannels()             # last channel
slice_no = 1 + imp.getNSlices() // 2        # integer division to get center slice
stack = imp.getStack()                      # get ImageStack object
calibration = imp.getCalibration().copy()   # get calibration

# create output dir workshop/images in home directory if it does not exist
outputdir = path.join(path.expanduser("~"), "workshop", "images")
print outputdir
if not path.isdir(outputdir):
    os.makedirs(outputdir)

# iterate over all frames and save central slice of last channel
for frame_no in range(1, imp.getNFrames() + 1):
    stack_index = imp.getStackIndex(channel_no, slice_no, frame_no)
    ip = stack.getProcessor(stack_index)

    # remove extension from image title and add frame no as suffix
    title = imp.getTitle().split(".")[0] + "-" + str(frame_no)
    single_imp = ImagePlus(title, ip)
    single_imp.setCalibration(calibration)

    # create file name with absolute path (incl directory name) and save
    outputfile = path.join(outputdir, title)
    IJ.saveAs(single_imp, "Tiff", outputfile)
Project 10: Modify Project 9 to include the following features:
- Apply either a Gaussian or Median filter of choosable radius to the extracted image plane.
- Downsample the extracted image plane by a certain factor (see next instruction). Pay to attention to where to place that command in relation to the
setCalibration()command. - Include a custom dialog that
- lets the user choose the filter mode (“Gaussian Blur…” or “Median…") and filter radius (sigma for Gaussian),
- lets the user to specify the downsampling fraction (0 < fraction <= 1.0). 1.0 would imply no downsampling. Hint:
Image>Adjust>Size.
Resources
Fiji Scripting
- Tutorial: https://syn.mrc-lmb.cam.ac.uk/acardona/fiji-tutorial/
- Tips for Developers: https://imagej.net/Tips_for_developers
- API: https://imagej.nih.gov/ij/developer/api/
- SciJava: https://javadoc.scijava.org/Fiji/
- Advancded: https://imagej.net/tutorials/imagej2-python
General Scripting